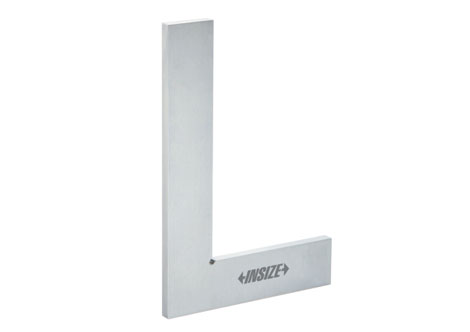
machinist squares (economic type)
Economic Machinist Squares – Precision Measuring on a Budget
A Machinist Square (Economic Type) is a precision measuring tool designed for checking the accuracy of right angles, aligning components, and ensuring the straightness and squareness of machine parts in various industrial and workshop settings. This economic version provides reliable performance without the premium price tag of higher-end models, making it an excellent choice for businesses and hobbyists who need cost-effective tools for everyday machining tasks.
Crafted from premium materials, these squares offer long-lasting precision and resilience, making them ideal for heavy-duty, everyday industrial use. Although designed for affordability, these squares maintain essential features such as precise 90-degree angles and high rigidity to meet the basic needs of machinists, engineers, and fabricators.
Key Features of Machinist Squares (Economic Type)
Basic Precision for General Use
Ideal for routine layout and inspection tasks.
Hardened Steel Construction
Provides durability at an affordable price point.
Simple Right Angle Design
Ensures reliable 90° accuracy for everyday jobs.
Lightweight and Easy to Handle
Convenient for use in workshops and toolkits.
Applications of Machinist Squares (Economic Type)
- General Machining: For checking the accuracy of angles and flatness in machined parts.
- Metalworking: To verify square edges, alignment, and flatness of metal components.
- Tool & Die Making: Essential for aligning parts and checking the accuracy of tooling setups.
- Woodworking: Suitable for use in woodworking projects requiring accurate right-angle checks.
- Assembly & Fabrication: Helps ensure parts are assembled accurately with 90-degree angles.
- Inspection & Quality Control: Used to inspect parts for geometric accuracy and tolerance.
How to Use a Machinist Square (Economic Type)
- Surface Preparation: Make sure both the machinist square and the workpiece surface are clean and free from dust or debris to maintain measurement accuracy.
- Positioning the Square: Place the machinist square against the edge of the workpiece. The base of the square should rest flat against the surface.
- Check for Gaps: Inspect for any visible gaps between the square and the surface. Any gaps indicate that the surface is not square.
- Repeat the Process: Move the square across the entire length of the part to ensure it is uniformly square.
- Use with a Feeler Gauge: For finer measurements, a feeler gauge can be used to check small deviations between the square and the part.
Technical Specifications
| Feature | Details |
|---|---|
| Material | High-quality steel (carbon or stainless) |
| Accuracy | ±0.05 mm (varies by size and model) |
| Edge Finish | Precision ground and hardened for accuracy |
| Sizes Available | Ranges from 2″ to 12″ (custom sizes available) |
| Angle | 90° right angle |
| Weight | Lightweight and easy to handle |
| Calibration | Can be calibrated for added accuracy (calibration service available) |
| Durability | Robust construction for daily use |
| Temperature Stability | Performs well under normal workshop temperatures |
| Storage | Store in a dry place to prevent rusting |
| Usage | Ideal for general workshop tasks and DIY projects |


